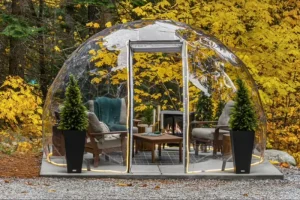
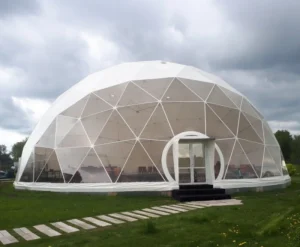
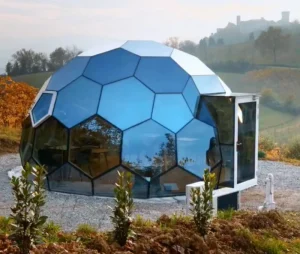
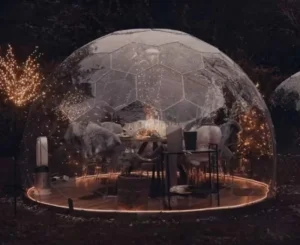
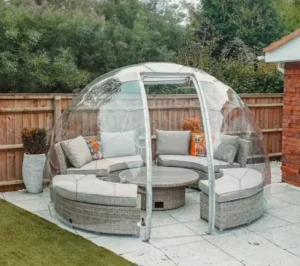
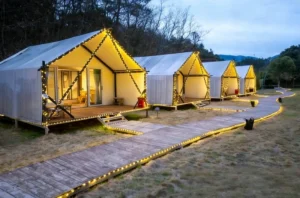
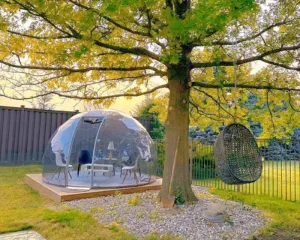
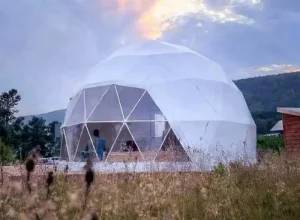
Geodesic Dome Tent is not only structurally stable and resistant to wind and pressure, but also has a high space utilization rate and unique appearance, which has been widely used in camping, greenhouses, art installations and commercial activities around the world in recent years.
After purchasing a bottom line dome tent, many of them need to be installed and erected by themselves. Building this kind of tent sounds complicated, but through reasonable planning and step-by-step execution, it can be efficiently accomplished even by non-professionals.
The following will provide you with a detailed introduction to how to set up geodesic dome tents, so that you can set up in advance for the steps and details have, can be completed in the shortest possible time to set up.
What is a geodesic dome tent?
A geodesic dome tent is a spherical structure consisting of multiple equilateral triangular units. The triangles are evenly distributed on the surface of the sphere to form a “grid” like mechanical structure that is extremely stable and resistant to pressure. According to the different density of division, this structure can be divided into different frequencies (such as 2V, 3V, 4V, etc.), the higher the frequency, the closer the dome is to a sphere, and the structure is also more complex and stable.
Dome tents are not only very futuristic in appearance, but also outstanding in practicality. Due to its unique spatial geometry design, it can cover the maximum space with the least amount of material and does not require support poles inside, thus realizing an open and free internal layout. This makes it popular for outdoor activities.
Currently, geodesic tents are widely used in various scenarios, such as camping or Glamping (luxury camping), art installations and brand exhibitions, eco-greenhouses, temporary classrooms, wedding event spaces, yoga studios, and even commercial retail flash stores. Its advantages include small footprint, sturdy structure, easy installation, and multiple reuse, making it a star product in multi-functional outdoor space solutions.
What do I need to do before setting up a geodesic dome tent?
Successful pitching starts with adequate preparation. Careful planning and preparation of materials and tools are essential before you start.
1. Planning and Design
First of all, you need to define the purpose of the dome tent and the required dimensions. Different frequencies (V value, e.g. V2, V3, V4) determine the complexity of the dome and the number of triangular units. the higher the V value, the closer the dome is to a sphere, but the more difficult it is to set up.
Next, the appropriate skeleton material is selected, such as lightweight PVC pipe, economical wood, or sturdy metal pipe (aluminum, steel). The choice of connectors (nodes) is equally important and can be bolts, customized connectors or 3D printed parts. Finally, the choice of covering material is based on the application, such as waterproof canvas, transparent film or polycarbonate sheets.
2. Tool Preparation
Having all the necessary tools on hand can make the building process twice as easy. You will need a tape measure, an angle ruler, and a marker for accurate measurements and markings. Cutting tools such as a saw or metal cutter are essential, as well as a drill and different sizes of drill bits.
Have wrenches, screwdrivers, or rivet guns on hand, depending on the type of connection you choose. In addition, safety gear such as gloves, goggles and helmets are essential to ensure safe construction.
3. Site Selection and Preparation
Selecting a flat, open and well-drained site is the first step in setting up a dome tent. Make sure the site is free from sharp stones or debris that may damage the covering material.
Reserve enough space for construction according to the size of the dome. Finally, consider how the foundation will be secured, whether it’s a simple ground spike fixing, a temporary sandbag counterweight, or a concrete base designed for long-term use.

Detailed step-by-step instructions for geodesic dome tent construction
Geodesic dome tent construction is divided into three main phases: building the skeleton structure, installing the cover, and completing the detailed features. Each stage needs to be carried out in an orderly manner and it is recommended that two to four people work together to ensure structural safety, construction efficiency and final results.
Step 1: Site Preparation
Before starting the construction process, you must first select a good location to set up the tent. Priority should be given to areas that are flat, well-drained and sheltered from the wind. If you plan to use the tent for a long period of time, it is recommended to lay the foundation first, such as concrete blocks, wooden platforms or ground anchor foundations to enhance the overall stability. For short-term use, ground pegs or sandbags can be used directly to fix the bottom structure of the tent.
At the same time, debris, weeds and other sharp objects within the erection area should be cleared to avoid damaging the covering membrane or affecting the construction.
Step 2: Prefabricated poles and node connectors
Determine the number and type of poles required according to the design drawings or modeling scheme generated by the software. Geodesic structures are usually divided into several types of rods of different lengths (e.g., Type A, Type B, Type C, etc.), which you can cut manually using aluminum, galvanized steel, or PVC pipes, and make numbered labels on each rod to facilitate subsequent assembly.
Next, prepare the corresponding number of node connectors, such as five-way or six-way fittings, which can be made from metal castings, custom welded heads, or commercially available connectors. It is recommended that some of the triangular modules be assembled on the ground in advance to form small unit structures to improve the efficiency of subsequent overall skeleton building.
Step 3: Build the skeleton structure
Assembling from the bottom is the basic principle of geodesic tent erection. First, place the bottom poles on the ground according to the circular layout, and connect them one by one to form the first circle of foundation. When connecting, make sure that each node is accurately seated, and use screws, pins or fasteners to fix it securely.
After completing the bottom, follow the structural hierarchy to build up the structure circle by circle. The triangles of each ring should be gradually staggered and connected to the lower level in a stable manner. This process can be verified one by one by referring to the drawing numbers to prevent the structure from skewing. It is recommended that when the structure is near the top, one person should be arranged to stand on a ladder or mobile support to operate the top part, while others assist in stabilizing the structure to avoid uneven stress.
After the whole skeleton is completed, each node should be checked again to see if it is fastened and whether the rods are in place to ensure overall symmetry and no deformation.
Step 4: Installation of Covering Membrane or Tarpaulin
After completing the skeleton, you can start to install the external covering layer. Geodesic tents commonly used external membrane materials include PVC coated cloth, waterproof Oxford cloth, ETFE film or transparent PC board. When used, the masking fabric should be pre-cut to match the corresponding size and number of triangular blocks according to the skeleton structure, and laid in numbered order.
The installation of the covering film usually starts from the top center area and gradually extends downwards. The edge of each cover sheet needs to be lapped with the surrounding membrane for a certain length to prevent rainwater infiltration. Secure to the pole by Velcro, Velcro, clip fasteners or screw presses for a tight fit.
Door and window areas need to be reserved in advance for suitable positions and sealed with zippers or aluminum alloy edges to enhance sealing and aesthetics. If transparent materials are used, viewing windows or skylights can be designed to enhance lighting and visual experience.
Step 5: Detailed Adjustment and Functional Supplement
After the construction is completed, the tent can be functionally improved according to the actual needs. For example, a flooring system can be installed at the bottom of the tent (wooden boards, carpets or removable plastic mats) to create a clean and comfortable space inside.
Tents can be equipped with ventilation systems, such as top ventilation windows, manually opening skylights or motorized exhaust fans, to improve air circulation and prevent condensation. It can also be equipped with shade cloth, thermal blanket or inner tent according to the season to realize cool summer and warm winter.
The internal structure can utilize poles to add hooks, lamps and curtains, and partition beds, storage, rest or display areas to create a practical and beautiful internal layout.
Geodesic Dome Tent Setup Time and Labor Recommendations
The time and labor required to set up a geodesic dome tent depends largely on its size, complexity (V value), and the materials chosen.
1. Time estimation
For a small (e.g. V2 or V3) dome tent, it usually takes 1-2 days if all the materials have been prefabricated. While for a medium or large (V4 and above) dome tent, it may take 3-7 days or even longer.
The pre-processing of materials (e.g. cutting, drilling) will take up a considerable part of the time. If these tasks can be completed in advance, the on-site erection time will be greatly shortened.
2. Manpower allocation
A small dome tent (3-5 meters in diameter) usually requires the collaboration of 2-3 persons. One of them is responsible for commanding and checking, while the other two carry out the actual assembly operation.
For large dome tents (over 6 meters in diameter), a minimum of 4-6 people or even more is recommended. Teamwork increases efficiency, especially when carrying long skeletons and installing covering materials. A clear division of labor and good communication are key to completing tasks efficiently.
Precautions and tips during geodesic dome tent erection
Following some key precautions and tips during the erection process can be effective in improving efficiency and ensuring the quality and safety of the final result.
1. Safety First
Safety is always the primary consideration throughout the build process. Always wear personal protective equipment (PPE) such as gloves, goggles and helmets to prevent accidental injuries.
When working at height, pay special attention to fall prevention measures, such as using safety belts or building solid scaffolding. In addition, avoid building under adverse weather conditions such as excessive wind, thunderstorms or snowstorms to avoid danger.
2.Accurate measurement is key
Geodesic dome tents are constructed with the highest level of precision. Any small measurement error may result in the skeleton not fitting perfectly, or the final structure being deformed or even unstable.
Therefore, it is important to double-check all measurements before cutting and drilling. Use high-quality measuring tools and make sure that every measurement is accurate.
3. Teamwork
Building a medium-sized or large geodesic dome tent usually requires multiple people to work together. A clear division of labor can improve efficiency, for example, one person is responsible for passing materials, one person is responsible for connecting nodes, and another person is responsible for inspection.
It is vital to maintain good communication between team members. When carrying out critical steps, such as lifting the top structure or installing large areas of cover material, all members should synchronize their efforts to ensure consistency.
4. Step-by-step inspection
Do not wait until the entire erection is complete. Immediately after completing each stage or connecting an area, all connections should be scrutinized to ensure that they are secure, that the structure conforms to the design drawings, and that there is no looseness or deviation.
Timely detection and correction of errors will prevent subsequent larger problems, thus saving a great deal of time and effort in reworking.

Geodesic Dome Tent Safety and Maintenance Advice
Geodesic dome tents are known for their solid structure, but they still require regular maintenance and inspection during long-term use. Reasonable maintenance not only extends the service life of the tent, but also effectively prevents potential safety hazards caused by the natural environment or human negligence. Maintenance is especially important for dome tents that are erected all year round.
Post-construction safety check
After the construction is completed, conduct a comprehensive safety check. Check that all skeleton joints are secure, bolts are tightened and rivets are in place. Make sure that the covering material is not broken and that all seals are intact and there is no risk of water leakage.
Especially after experiencing high winds, heavy rain or snowfall, inspections should be carried out immediately to ensure that the structure has not been compromised.
Routine Maintenance and Care
Regularly clean the covering material of the dome tent, removing dust, leaves or other debris to keep it light-transmitting and aesthetically pleasing. For waterproof materials, avoid using corrosive cleaners.
If you find a small damage to the covering material, you should repair it in time to prevent the damage from expanding. Check the skeleton for signs of rust or deformation and treat or replace it in time.
Long-term storage recommendations
If the dome tent needs to be dismantled for long-term storage, be sure to thoroughly clean all parts and allow them to dry completely before dismantling to prevent mold or rust.
Sort and pack the skeleton, nodes and covering materials and store them in a dry, ventilated place away from light. Avoid stacking heavy objects to prevent deformation or damage to the materials.
Frequently Asked Questions and Solutions for Geodesic Dome Tents
What if the dome feels wobbly and not stable enough after I finish setting it up?
Check that the length of all skeletons is accurate, any length error may lead to uneven stress. Make sure all nodes are connected tightly and bolts are tightened. Check whether the foundation fixing is firm, whether the ground nails are deep into the ground and whether the counterweight is sufficient.
Why does the covering material leak when it rains?
Check that the covering material is properly installed, especially at joints and opening edges. Make sure any seals or waterproofing tapes are properly installed and not deteriorated. Check for tears or perforations in the covering material itself and repair them promptly.
Unsure which skeleton or covering material is best for your needs
PVC pipe is a good choice if you are looking for lightweight and economy, but has limited strength. Wood is moderately costly but requires preservative treatment. Metal pipes (aluminum, steel) are the strongest, but cost more and require specialized tools to cut. For covering materials, waterproof canvas is economical and durable, clear film is suitable for greenhouses, and polycarbonate sheets provide the best light transmission and insulation. Consider this based on budget, usage and building experience.
Summary
Building a geodesic dome tent is not only a creative building experience, but also a great way to personalize your outdoor space. Through scientific design and standardized operating procedures, even non-professional users can successfully complete the whole process from zero to one.
Good maintenance habits should also not be ignored during long-term use. Regularly checking the structure, repairing the tarp, clearing rain and snow and maintaining ventilation are all key measures to extend the life of your tent and ensure safety.
Whether you’re traveling for camping, exhibitions, commercial displays, or looking for a unique portable space, geodesic dome tents can meet your needs.
If you’re looking for a high-quality, structurally stable geodesic dome tent that supports customization, Gaxdome is your trusted partner.
We specialize in providing:
- Commercial grade and camp dome tent design, manufacturing and volume supply
- Multiple size options: 4m-10m+ diameter available
- Personalized customization service: windows, ventilation, transparent view, inner structure can be customized
- Experienced exporter, support global shipment
Contact us now for a 1 to 1 design consultation and quote proposal.